Pages

Tampilkan postingan dengan label * DECORATING THE HOME. Tampilkan semua postingan

Decorating for Spring - Indoors

Selasa, 06 Januari 2015


Bringing the Garden & Spring Inside

As we are working away outside, I see that this is exactly where we were last year, and most likely the year before. Trying to get some gardening done before the real heat hits, like 90's heat!
And this is about the same thing I wanted to do inside as well. 

The urn above is painted with Old White Annie Sloan Chalk Paint, Dry Brushed with Pure White, and Glazed with a Brown - Gray Paint Mix for a little aging. 

The large Moss Ball is a styrofoam ball from the craft store purchased with coupon of course,
and covered with Bright Green Reindeer Moss.
The moss is hot glued and adhered to the ball with metal florist picks. 

Come back soon for another look at some of 
The Decorated House Readers' Favorite Posts.
...........................................................................................................

Wondering how to bring a little Spring inside, but without buying anything new? There are so many ways! The entry table is dressed with a few old favorites, this lovely white painted urn with a large reindeer moss ball, a beautiful antique vellum book from the 1600's, and a mercury glass crown. The urn is a perfect contrast to the black marble top. I'm not sure that these 3 items have ever been used together before. New fresh spring look, nothing new purchased! Perfect.

I was spying the antique blue bottles that I used last year holding a single flower or two on the mantel. But at the moment we are spending days outside redoing planting beds. Trying to get more done before the temps hit the 90's. We made great progress but there is much more to do yet. The kitchen courtyard needed very little work. It is such a wonder micro-environment. It was time to add some seasonal flowers, but all the shrubs are now established and look wonderful.

See Y'All Soon~

 ................................................................................
Click on the pictures below to visit The Decorated House Shop!


Decorating for Fall - Autumn with Vintage

Jumat, 02 Januari 2015


No the Keno brothers from Antique Road Show are not looking for this little boot; this is a different kind of treasure. Family "treasure" might be a stretch, but this little copper plated boot - shoe was Sweet Hubby's so it  makes it a little family treasure. His mom kept long after he was grown, and gave it to him several years ago. Most of the time it has been on my desk being used to hold trinkets, paper clips and who knows what since then. At least it has been out and not stuffed in a closet. Since this Fall the decorating is copper and lime green, the search was on for copper. And this little "treasure" was perfect for holding a special pumpkin.

There is always a place in our Fall Decorating for this beautiful hand painted ceramic pumpkin. It has been a part of Fall for so many years, and it is always fun to bring it out.  The copper coffee pot also has been around here for at least 20 plus years. It has been hiding in the garage as I contemplated how much of the old copper stuff to give away. I actually forgot it was still here. Filled with late sumer flowers it adds a nice extra touch of copper. 


Sitting in the little round glass area of the copper shoe  is the smallest of the velvet pumpkins that I made. You can see how I made the pumpkins HERE.  If you are thinking that you would like to make some of these but you just can find any dried real pumpkins stems, then why not make your own? 

I had one pumpkin stem that was my favorite, but it was too large for this little velvet pumpkin, so I made a new stem for it. This one is made of air dry clay. I don't have the package so I'm not sure if it is paper clay. The air dry comes in different types, but I think this kind is the paper. It is very easy to use, and you can keep it from drying out by keeping a damp paper towel in a plastic bag with it.


I haven't used it in almost a year and it was not dried out at all inside the plastic bag. I laid a damp paper towel over it for a few minutes before I began sculpting with it, and if a spot seemed to dry I just dipped my fingers in a little water and applied it to that area. Very easy and fun to play with. 

~ See Y'All Soon ~

~ Magnolia Leaves & Burlap Flowers - Fall Decor ~ Natural Elements

Kamis, 11 September 2014

The Decorated House ~ Fall Decorating Burlap Flowers and Nature
 Magnolia Leaf Wreath 
and Burlap Ribbon Rosette w/Lace

Magnolias leaves, one of Mother Nature's best inventions are such a perfect natural element in Fall decorating with their beautiful shiny green leaves accented with rich velvet copper on the underside. This is my inspiration for Fall decor this year.  No wonder people have been decorating with them for so many years. And now it's Fall...well kind of. It's still quite warm, but you can fell the change in the gentle breeze during a morning walk. From now through the holidays the magnolias have wonderful seed pods in addition to the pretty leaves, and that makes them so perfect for decorating.

The Decorated House ~ Fall Decorating - Burlap Flowers and Nature

So while we were out walking the last few mornings  we also collected some natural elements to add to our home for Fall. I can remember when we were first starting out Sweet Hubby used to go out on bike rides and bring me back bags of weeds, flowers and pods to use for arrangements. This year I decided it would actually be fun to do much the same thing, and to  mix it up with a few things that I already have or a few things to buy, like this darling burlap ribbon with white dots!

This is another take on the fabric flower rosette that you all like so much.  You can find the directions of how to make it HERE. This time I used a burlap ribbon. So there is no need for you to cut fabric into strips, the ribbon is ready to go. It's the same technique, roll the middle bud, then fold the ribbon away from you and roll it around the bud, fold backwards and roll...and just keep going until it is the size you want. Add a drop of hot glue or stitch it to keep the rose in shape. 

I'm loving the copper and lime green this year. Perfect Fall colors for me. And then Halloween just around the corner. The last days of each year go so quickly don't they?!

See Y'All Soon~


~ Magnolia Leaf Candle - Fall Decorating ~ 1 Little Project at a Time

Minggu, 07 September 2014

The Decorated House : Fall Decorating - Magnolia Leaf and Burlap Wrapped Candle with Fabric Rose
 Magnolia Leaf  and Burlap Ribbon Wrapped Fall Candle
with Flower Rosette and Rhinestone Button

Even with the temperatures are still in the 90's around here, the pull of Fall decorating is gently tugging at me. I've been playing too much of the "if only" and "as soon as I get ______ done" games ..... if only all these work projects around the house were done, then I could get out the Fall goodies and decide what to do this year. So instead of playing that silly game, it's time to just do one little project at a time. Too much work and no decorating makes some girls grumpier than than they need to be. So let's play and make something very pretty and very, very simple. 

This is very similar to the candle HERE that I made before for Christmas time. For this one, we will use the beautiful copper side of the leaves turned out. The pretty shiny green side peeks out at you as you look at the candle from different directions.

All you need to do is put a rubber band around the candle and tuck the leaves inside it spaced the way you like. Then tie a ribbon or two to cover the rubber band. Add a pretty embellishment lie the flower and you are all done!

It is that rich and beautiful copper color that is really singing my tune right now. This color is so very pretty and just speaks fluent Fall. Now to figure more ways to work it into the Fall decor.

The ribbon here is a burlap with white dots. This will be used in other pretties for Fall and/or Halloween this year. This ribbon can easily be found at the craft store.
(** Please remember burlap usually has  formaldehyde on it. So keep it out of the reach of children and pets!! I wear plastic gloves in case I go into the kitchen after making something with it.)


The front is embellished with one of the lovely fabric flower rosettes that I posted about HERE with instructions and pictures to make your own. There are so many pretty projects that you can use these for. It is finished with a wonderful vintage rhinestone button, but you could use something new that looks old as well.

You could make a couple of these in a short time. I made some flower rosettes out of the same  white dotted burlap ribbon and they turned out really fun, so I'll be using them along with this candle. If I get just one little project done at a time, maybe I'll have some fall decorating soon!

See Y'All Soon~

~ How to Print on Fabric Using an Inkjet Printer - Image Transfer - DIY - Tutorial

Kamis, 28 Agustus 2014


The Decorated House: ~ How to Print on Fabric - DIY - Tutorial - Inkjet Printer Image Transfer

There are many ways to create an image transfer on fabric. This is one of my favorites!
And it has become one of my reader's favorite tutorials as well.

Forget the spay glue adhesive and freezer paper. This is much better.
It is very easy to do and requires no messy chemicals to transfer your image to fabric. 
This tutorial will show you how to use your inkjet printer at home.
(I have read that others used their laser printers for fabric,
but I have not tried it, so I cannot say how it works from my
own experience.)

** All art in this tutorial is the original, copyrighted
art of Donna, The Decorated House. **

CONTINUE READING

~ Decorating with Shells - Gifts from the Sea

Sabtu, 02 Agustus 2014

 The Decorated House ~ Decorating with Shells - Vintage Blue Bottle - Starfish

Living Room Mantel 
Moss Ball in Vintage Milk Glass Urn
Starfish, Shells and Antique Blue Bottle
Living in a sub-tropical beachy location for almost my entire life means that shells bring back lots of memories.
CONTINUE READING

~ New Ottoman From An Old Wicker Trunk - Chest

Sabtu, 19 Juli 2014


The Decorated House :: Antique Books with Vintage Silver and Moss - Living Room Ottoman

Make a Pretty Ottoman Coffee Table from a (Wicker) Trunk:
CONTINUE READING

~ Decorating for Easter

Sabtu, 29 Maret 2014


The Decorated House. Decorating for Easter. Moss Ball, Cement Bunny, Antique Vellum Book
It's time for Easter decorating this weekend, I hope! Here are a couple of pictures from a couple of years ago. One of the best things about blogging is that you can go back and see images from other years. I totally forgot about that cute garden bunny. Wonder where he is? He might hop back inside again this year.
-------------------------
The bunnies are running wild in the house this year. Even this little old garden bunny is inside. I think he has been somewhere on the porch for couple of years, although he was an outside bunny once upon a time. He is sitting beside a reindeer moss ball in a slightly tarnished bowl. Together they are perched atop a beautiful antique Italian vellum book from 3 Fine Grains.

Thanks for the nice comments on the last post, but I deleted the whole thing due to an overactive spamming party over the weekend. Thank goodness blogger has that spam filter now. I've included the same picture below that was in that post. An open shelf cupboard with drawers in the kitchen. It won't be there forever since open shelves are too much work to keep clean for me.

The Decorated House - Kitchen White Dishes - Small Space Storage

This coming week I'll add a few more pictures of Easter decorating around the house.
Thank you for stopping by!

Have a Great Weekend 
See Y'All Soon~

~ Milk Glass & Succulents and a Little Green for Spring

Senin, 24 Maret 2014

The Decorated House : Decorating with Milk Glass & Succulents

The Spring Equinox! It always brings out that longing for the green of Spring and Summer. The heat will be here soon enough, so I'm not trying to rush Summer. It does however make me want to bring more green inside for a little while.
Milk glass is one of those old fashioned goodies that I wish I had seen the beauty of years ago.  But in the past, there was so much of it at the thrift shops, it made it seem just to grandma-like for my taste. Whatever pieces I used to have were long ago given to the Goodwill. In the last few years however I have picked up some here and there if it had really nice lines. Today, you can think of so many ways to incorporate this simple and beautiful white glass into your style even if you haven't quite embraced the grandma style. The lines of the ruffled pieces are so beautiful.

I'm still experimenting with succulents inside the house. They are so extremely easy to grow outdoors, but are a bit more difficult to grow indoors. The ones on the chest right by the window are doing very well. This one  is sitting on the coffee table further away from direct window light. So we will see how it does with less light that the other plants get. For many years I always had house plants, and just got away from tending them because there was plenty of work to keeping the ones outside alive and well.  Now it's one of those things that I miss having so I'm looking for some easy to keep green lovelies this year. 

The Decorated House :: Decorating With Milk Glass & Succulents

Also some green pillows are on the sofa at the moment. What is easier that changing out pillows with the seasons! Since pillow covers are so inexpensive and easy to make, just this simple change can keep your interiors looking fresh to you. 

Again after ignoring milk glass for a while, I fell in love these ruffled bowls. Instead of too old fashioned, they actually look quite modern to me.  They remind me of some of today's lovely blown glass art pieces.

The Decorated House : Milk Glass & Succulents

I'll let you know how all these succulents do inside. They may need a bit more attention than I seem to give indoor plants. I also brought in some bromeliads from the gardens, after washing them very well, which are doing fabulous. They are air plants after all, so other than giving them too much attention, they should be very easy to keep inside.  So far all I did to them is stick them in a container, pretty them up with a bit of moss, and remember to water  the little "cup" in the center before it gets dry. Now anyone can do that!

See Y'All Soon~

~ Small Kitchen Storage

Kamis, 22 Agustus 2013


Where to put those small kitchen appliances??

Work in the kitchen is continuing. It is taking a great deal more time than I had planned. Maybe it began with the slightly crooked drawer which was a learning experience to figure out how to make it perfectly straight. Or it might have been the desire to have more pull out baskets in the cabinets and to make them all match. It's hard to remember what started this latest episode of the kitchen redoing. The more work I've done, the more it seems it might have been easier to have just torn the place up and cabinets installed. I just didn't want the kitchen so torn up that I couldn't cook for more than 24 hours. I love to cook, and eat!


After all the work, I'm not even sure too many people would notice there is a difference! A lot of work has been on the inside, reworking the limited cabinet spaces with more pull out wire baskets, adding more turn tables, painting the insides as needed and just trying to get more organized and less cluttered.

When the new refrigerator came a few years ago, it turned out to be less than 1/4 inch too wide to fit in the space intended for it. So we brought in this white "hutch" that was once used in the living room in it's original natural wood finish, and years before that it held a TV. Yes, televisions used to be smaller!  It had been painted white at some point in time, but need repainting to match the other white in the kitchen.  It certainly filled up quickly with things from the kitchen. And since I have almost no drawers in this room, having 3 nice size drawers was very welcomed.

When I was tired of getting the big mixer out of a lower cupboard one more time, it was moved here where we kept other small appliances that we use on an almost daily basis. Instead of worrying about having these things out in plain site, I'm going to just embrace the convenience and the pretty lines of these work horses in the kitchen.

~ See Y'All Soon ~

~ French Chair ♠ diy ♠ Painted with Annie Sloan Chalk Paint

Senin, 22 Juli 2013

The Decorated House - Tutorial Annie Sloan Chalk Paint on French Chair

Looking for a really rustic, distressed French Blue look? Try this method.
CONTINUE READING

~ How to Make a Pottery Barn Style Monogram Pillow, DIY

Kamis, 18 Juli 2013


This is where I used one of the last flowers I showed you how to make. It adds a lovely touch to the Pottery Barn style pillow. How to make the fabric flowers can be found here and here and here and here.

The pillow here is a simple envelope closure style pillow cover. I have written a tutorial on it here

1. Choose a simple flat weave fabric like a cotton or linen for this project. My pillow is made with a    medium weight cotton. You can use a linen or cotton or blend or any plain fabric you like.

2. Find a font that you think would look good as your monogram, but also one that will be easy to cut out.  Play with the size of the capitalized letter to see who large you need for your pillow or project. Just print it out in draft mode to save ink, cut it out and see how the size works for you. 

3. Print out your letter on plain paper. Then cut the letter out exactly how you want the monogram to look on the pillow. 

4. Lay the cut out letter on top of a piece of felt. If using white felt as I did here, use a pencil and lightly trace around the letter remembering the inside parts as well that need to be cut out. 
If you are using a dark felt, you can just a piece of chalk to trace the letter. 

If you use felt, there is no need to hem or fix the edges. When using a different fabric you will need to hem it, or use a no fray liquid on it.

5. Attach the letter/monogram to your pillow with fabric glue or by lightly sewing it on.

Then if you wish, you can either embellish at little like adding the fabric flower or just leaving it with the monogram alone. 


See Y'All Soon~

~ Queen Bee Digital Art in the Shop! With BeeHive & Paris

Jumat, 12 Juli 2013


Queen Bee Art with Paris, Crown and BeeHive

There is a new Queen Bee Digital Download in the shop.
Thank you to the nice people who
have asked for it.

Hope you all have a 
Wonderful Weekend!
See Y'All Soon~

~ Bon Appetit! Brownies - French Farmhouse Kitchen & White Kitchens

Jumat, 28 Juni 2013


When I first saw the cover of the latest Bon Appetit magazine, all I wanted was a brownie! As much as I love chocolate chip cookies, brownies sometimes are even higher on the food chain of desire.


As usual this recipe had a bit too much saturated fat for the way I like to cook and eat. I want to enjoy my food without worrying about clogging my arteries. No I didn't think about that sort of thing when I was twenty.

I'm busy working on the kitchen. Not the biggest makeover I've ever done, but lots of things on the to do list nonetheless. As usual one thing keeps leading to another. Hope you enjoy this post with a wonderful and unique French Farmhouse Kitchen featured in Bon Appetit.


The the first kitchen posted here, which is in the same issue as that brownie, stole my heart. So I had to take a closer look. Is it the stove? The cabinets? The sink? How about this antique table? Um, maybe. The yellow isn't my color, but I love the floor and the wood cabinets with white.

The white kitchen above also appeared in Bon Appetit, last year. This time it is easy to know exactly why I love it. The white is fresh and clean looking with the dark stained chairs and floors.

And the same for the Christopher Peacock kitchen below. I don't think I could find a kitchen designed by that man that I would not love.


The most interesting thing to me about the French inspired kitchen in the first picture, is that I'm not in love with all of the individual things in the kitchen, and yet..... I love the space. I feel very at home looking at this space. The sum of the parts in this kitchen, designed by my favorite kitchen designer, Mick de Giulio, is much greater than the parts, for me anyway. I guess I just need to study this one for a little while, as I munch on some brownies of course. It just might be the antique island that calls out to me the most.

....................................

When I first wrote this post I was experimenting with different recipes of gluten-free brownies. There are lots of good recipes that you can find on line. It turned out to be a fairly easy one to come up with. The chocolate hides any unusual taste from the gluten free flours. My favorite is to use ground almonds with a small amount of brown rice flour. Yum!


See Y'All Soon~

  ................................................................................
Click on the pictures below to visit The Decorated House Shop!


~ How To Make a 5 Minute Pillow ... Maybe 10 Mins.

Sabtu, 08 Juni 2013


You can make a pillow like this in 5 minutes! Maybe 10.
Tutorial & Step by Step Directions:
-------------------
Read on to see another one of my Reader's Favorites
(Click on the link below to read more!)

CONTINUE READING

~ How To Upholster a Simple Chair Seat Cushion

Senin, 03 Juni 2013


DIY - Tutorial - How To Upholster a Simple Chair Seat.
Readers' Favorite Posts
..............................................
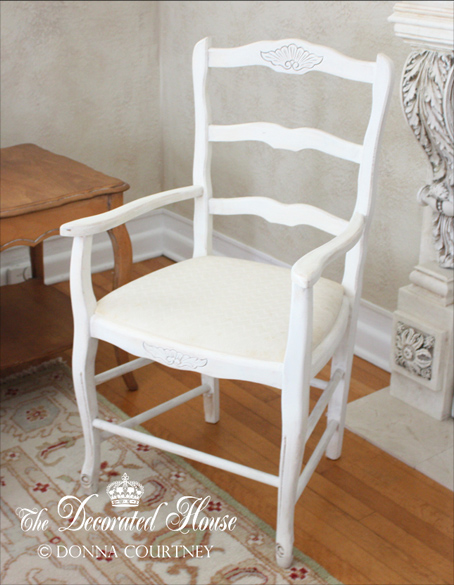
When you last saw this chair it was a very distressed paint finish of blues to gray and white. Shortly afterwards, everything went almost back to neutral in the living room, including the little Italian made French style chair. The off white suits me much better. It is now painted a mix of Old White and Pure White Annie Sloan Chalk Paint. (If you are not familiar with the product, this is not "chalkboard" paint.)


As is usual for my changing desire of color,  I needed a burst of color again as noted in the last post of the very quick blue and white pillow made out of the same fabric. This is not the fabric I thought I was using for this quick change the living room. Instead it was one of the two companion fabrics that I liked much more once I had the larger pieces home. I'm sure the other pieces will find some other fun projects to suit them.
This is a really simple project. Here's how you can do it, too. Click on the link below to read more.


CONTINUE READING

How To Create Beautiful Turquoise Patina - "Secret" Tutorial - French Drawer Pulls

Kamis, 30 Mei 2013


Readers' favorite posts: How to create this beautiful patina for French drawer pulls or any other thing you might want to paint!
........................


The "secret" is how  darn easy this is! I certainly hope it didn't sound like the painting of the drawer pulls was some difficult or complicated secret. It certainly isn't. It's quite simple. Like most "secrets" this one is pretty easy to figure out, and you probably already have! Don't worry about changing it to suit your needs, go right ahead, it is very adaptable.

The drawers pulls only appeared to be more complicated to paint than they actually were. When I looked at the ones I had painted previously, I wanted to replicate the look but I wasn't sure how I had done it.  No notes left behind as usual. After figuring it all out again, I happy to share the "secret" with you.


CONTINUE READING

~ How to Make Fabric Flowers Continued ... DIY Tutorial

Kamis, 23 Mei 2013

Next we will make some fabulous fabric flowers using the little rosette posted about here if you don't already know how to make them. Once you get started with them, it's hard to stop finding new ways to embellish them!


Above you will see the supplies you need. Very simple, very cheap. Cotton fabric, the kind that frays is my favorite for making this style rustic yet elegant look. Pieces of lace, old or new. And your rosette that we already made.

CONTINUE READING

~ How To Make a Fabric Flower ~ Rosette Step 1

Selasa, 21 Mei 2013

How To Make a Fabric Flower Rosette ~ The Decorated House. So easy, step by step instructions.
How to Make A Rosette Fabric Flower.
.....................
While I am busy working on some projects around the house, I hope you
enjoy some of the favorite tutorials and makeovers chosen
by the readers of The Decorated House.
......................

After posting my Valentine's Day Pillow, several people asked how to make the flowers. So here is a little tutorial for the basics and some different variations with step one: The Rosette.


How To Make a Fabric Flower Rosette ~ The Decorated House. So easy, step by step instructions.
After you cut a strip of fabric, fold it in half lengthwise.
Then fold and roll the edge under.
Put a tab of hot glue or fabric glue to keep it in place.
(Continue to Directions at link below)

CONTINUE READING

~ Easter Decorating - The Decorated House 2012

Senin, 11 Maret 2013


It was hard to resist these reproduction vintage Easter decorations a few years ago. They are all delightful, but I have to say this one is a favorite. How can you resist

CONTINUE READING